Skill: Control box Building
Skill level: 3
Wiring
Learning Objective
To create a control box system inside a new enclosure including an FCU, gate controller and all the components required for the system.
1. Overview
Building a control box is a key part of any gate installation. Careful planning ensures you have enough space for all the component parts and if possible have a bit of space for futureproofing too. Components must be neatly and securely arranged, safe and dry and labeled for clarity.
2. Tools & Materials Required
Cordless drill
Board standoffs
M4 drill and tap, or drilltap
10mm nut runner
The control box and back plate
Marker or marxman
Mains flex
Wagos
20mm, 38mm and a 60mm hole cutter
Silicone sealant (for weatherproofing)
Mounting templates (if supplied)
PPE: Safety glasses, gloves, mask
3. Preparatory work
Carefully think about what the system will include – e.g., intercom, safety edge interface, power supply, the gate control board etc
Decide what size and how many ducts will enter the box so you know what size and qty holes to drill.
Gather the parts so you don't miss any out.
4. Procedure
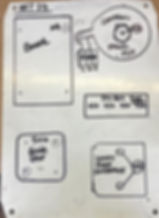
With the back plate out of the enclosure and on a flat surface lay out all your parts.
Allow for extra parts, or extra length on the DIN rail for futurproofing, especially on a basic system where customers are likely to want to add features later on.
Do not have components too near the bottom of the back plate where the cables enter of they will interfere with the cables.
Do not go too close to the edge or other parts or you wont be able to gain access to remove them.
Check which way the fuse comes out on the fused spur (FCU) so you don't block access later.
Mount the FCU close to where the mains comes in.
Use screw in M4 nylon standoffs to mount all relevant boards.
Use self drilling screws to mount DIN rail and FCU.
You can pre-wire a lot of the components on the back plate before you fit it into the box. The mains voltage parts can be wired in parallel or using Wago connectors. Remember to earth the FCU back box.
Label parts for clarity later, especially gate power, entry loop, exit loop and relays if present.
Drill your incomming duct hole before mounting the back plate in the box, so you can blow it out and not make a mess and not risk damaging your component with the drill. Remember not to drill too far to the back of the box as the back plate does sit 20-30mm forwards and you don't want your cables sticking straight into the back plate.
Finally fit your back plate into the box and secure it with all 4 nuts, no need to overtighten.
leave the plastic keys on the door, they stay in well and risk being lost if you take them out. If customers want to remove them later that's their choice but I advise to leave them in.
5. Best Practices
Keep parts well spaced.
Use large size writing on labels.
Use standard colours for standard components on every install.
Have the mains incomming on its own gland.
Keep wires just the right length and nicely cable tied together
Wind up spare cores neatly.
Take a bit of extra time to do a nice job.
6. Common Mistakes to Avoid
Drilling the duct hole too far back.
Not using all available mounting holes.
Ripping out the M4 thread with the tap.
Leaving components floating in the air.
Mixing colours, knotting up cables.
Leaving bare conductors
refer to electrical safety SSOW