Skill: Duct planning and Cable Routes for a Gate Installation
Skill level: 3
Wiring
Learning Objective
Learn how to plan and install ducting and cable routes properly, using correct materials, methods, and routes. Understand how to consider all accessories, site conditions, aesthetics, and long-term reliability — and how to communicate clearly with the team and customer during planning.
1. Overview
A successful gate install begins with good planning — especially when it comes to ducting and cable routes. Every job is different. You need to think ahead, consider every accessory, and make decisions that balance durability, appearance, and practicality.
Getting this right avoids rework, keeps jobs on time, and ensures a clean, professional result.
2. Tools & Materials Required
Duct-grade CAT5 (external, burial rated)
Direct-bury (DB) alarm cable
Black-sheathed UV-resistant cable
20mm black flexible conduit (for accessories)
20mm, 40mm or 63mm duct (for driveways and long/high-capacity runs)
Draw rope for ducts
Wiska boxes
Duct sealing glands or foam sealant
Marker tape or labels
Shovel, trenching tools, drill, and core bits
Measuring tape and marker spray
3. Before You Start
Review job notes and accessory list (photobeams, intercom, antenna, keypads, loops, etc.).
Walk the site to check ground type (soil, tarmac, concrete, paving).
Agree ducting and cable routes with customer and team before trenching.
Allocate realistic time for trenching and reinstatement.
Confirm if extra ducts should be added for future-proofing.
4. Procedure
a. Plan Runs
Looking at the jobsheet, list every accessory and its cable needs. Think about the whole job and all its accessories eg:
Antenna/s
Safety edges
Exit buttons
Motors/limit switches
Entry/exit loops
Mains power feed
Safety beams
Intercom
Keypads
Decide where ducts will run, avoiding tight bends and future obstructions eg fencing
Consider groundboxes, centre stops when running ducts across the driveway.
Consider work done by others eg granite sets across the driveway, path edgings etc...
b. Select Ducting
Use 63mm duct for long/high-capacity runs or across driveways.
Use 40mm for small jobs, single gate automations.
Use 20mm conduit to individual accessories.
Always leave a draw rope inside ducts.
c. Install Ducts
Lay ducts at a safe depth 150mm min, 450mm for mains power runs
Use dig tape to protect from digging later.
Avoiding sharp bends.
Concrete over ducts for strength across driveways, leave 20mm for tarmac top up.
Label or record which duct goes where.
Use sweeping bends, not 90° corners.
Leave plenty of length, the control box will be about 5-600mm above ground level.
Never have ducts entering in the top of connection boxes or enclosures.
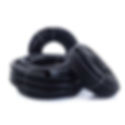
Always have ducts with a drip loop to shed water before entering connection boxes, see image.
Site electrical connection boxes at least 200mm above ground level where it's drier.
d. Run Cables
Always use direct-bury or duct grade cable inside ducts.
Use black UV-rated sheath above ground.
Allow drip loops at entry points.
Enter cables via the bottom or back of enclosures.
Seal all entry points with glands or sealant, even if inside as this will protect from insect ingress.
Seal enclosure mounts with silicon.
Seal duct ends with silicon to prevent rodents getting in.
e. Finishing
Protect expoosed cables from strimmer/vehicle damage using rigid duct or metal strips
Allow extra cable/duct length at both ends.
Photograph and document routing and ducts for future servicing.
5. Best Practices
Always discuss ducting plan with customer and colleagues, they may have info you need.
Futureproof by adding spare ducts/cables when possible.
Keep cable routing logical and neat.
Protect visible cables against accidental damage.
Record duct/cable runs in job notes for long-term clarity.
Enter ducts and cable at the bottom of connection boxes for waterproofing.
6. Common Mistakes to Avoid
Using indoor or non-UV cable outdoors.
Entering enclosures from the side or top (causes water ingress).
Forgetting cable runs for antennae, safety edges, or extra accessories.
Using ducts that are too small, making pulls difficult.
Not sealing around cable entries.
Leaving cables loose or at strimmer height.
Not burying deep enough
7. Safety Information
Safe installation of ducts and cables reduces electrical risks, prevents service faults, and avoids rework. Always follow:
SSOW – Ducting & Cable Installation
RAMS – Groundworks & Trenching
SSOW – Use of Power Tools & Drilling
RAMS – Manual Handling & Lifting
SSOW – Electrical Safety for Low-Voltage Systems